Project: The Office
(totally not a games room)
18th March 2022
Having recently moved into a new home, I decided to take the opportunity to refurbish one of the rooms into my dedicated office (totally not a games room). With my job converting to a hybrid model of a couple of days in the office and then the remainder as remote working from home, it makes sense to have a dedicated area for my office (totally not a games room).
This is a story about the room, which took about eight weeks of planning and preordering supplies, and then another four weeks from start of construction to finish. You can jump ahead using the links here, or read the story in full.
- Final Results (before/after)
- Planning the Office (totally not a games room)
- Demolition & construction time
- Painting
- RGB all the things
- Done and done
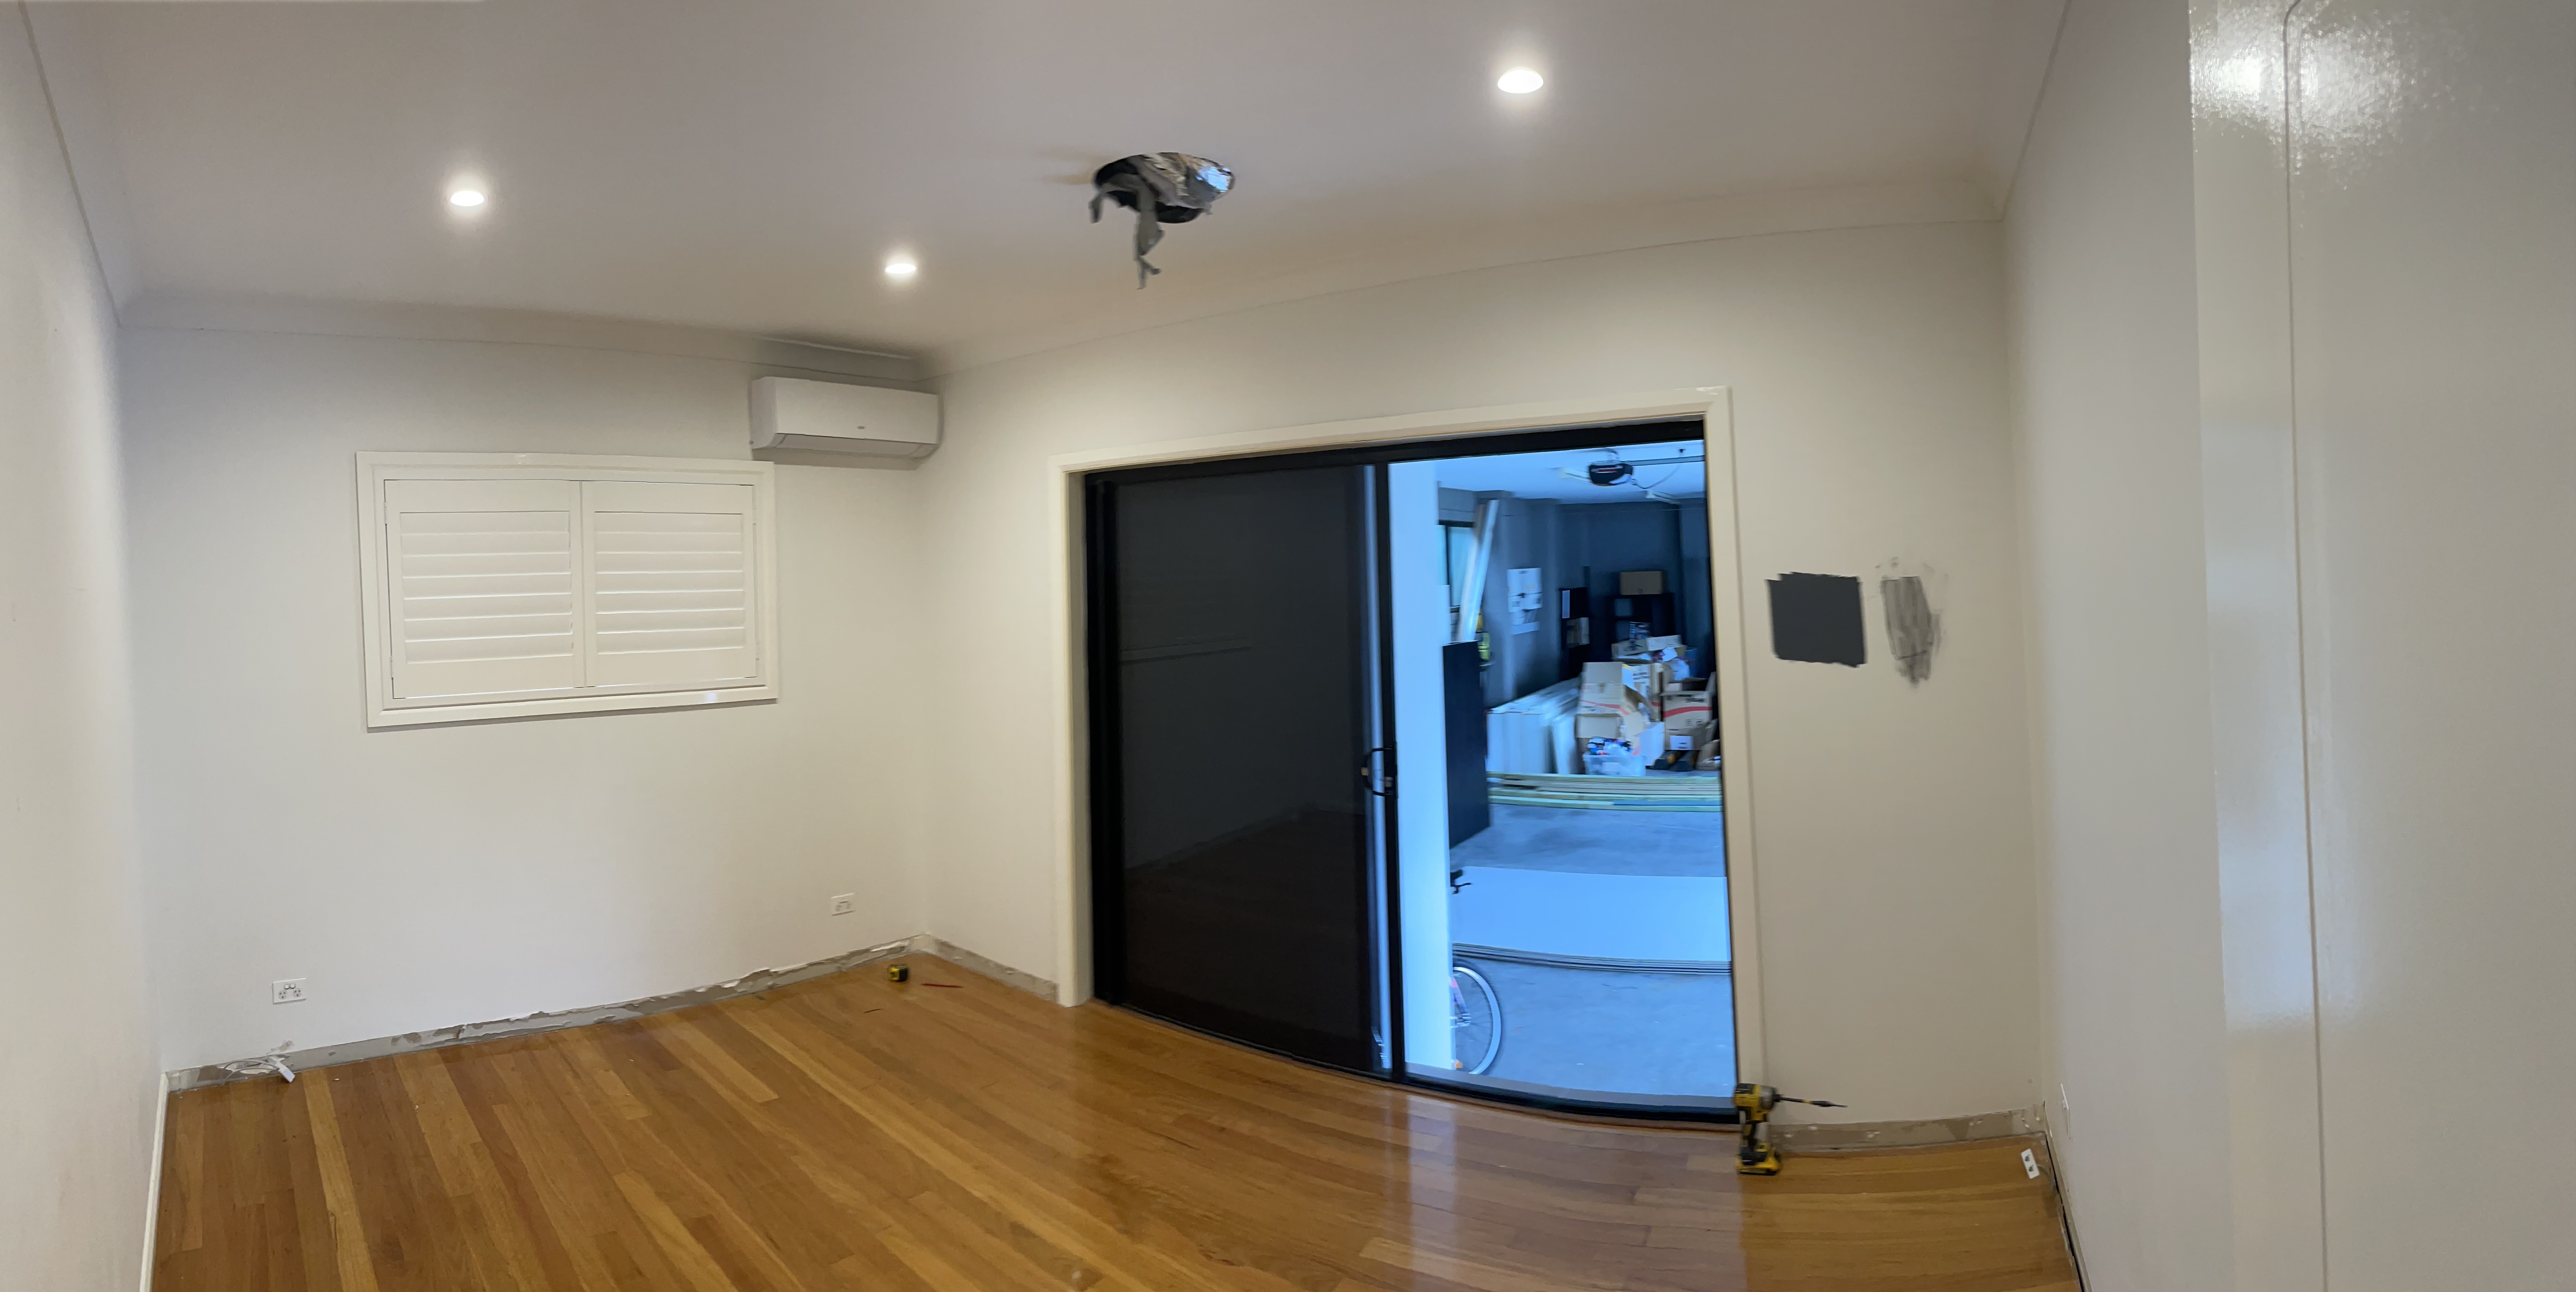
Final Results (before/after):
Firstly, before I get into a long boring story, let me show you the before and after to put everything into context (the video has sound):
Planning the Office (totally not a games room):
I knew that I wanted to do something a little different. Having worked in corporate office spaces and starting at white walls for long periods of time, it was time for a change.
For the room itself, it was originally part of the back of the house (prior to the previous owner's major renovations). So it had a double sliding door into our garage, which I didnt need (because there was another room with another entry into the garage). So the first idea was to have that door permanently closed off and reclaim the wall.
The second part I knew I wanted was improved sound dampening. The house is a two-story place, and it currently allows lots of noise to "travel" between levels. My daughters bedroom is right above my office (totally not a games room), so I knew this was the one opportunity to add better sound insulation to reduce (not block) some of the gaming office noise.
My office (totally not a games room) would also form a room for the kids to do some home work on the computer (not for playing games) as well. So having a cool location for them to do their study (not playing games) was also needed.
Then I started searching around for "cool office (games) rooms" and similar styles. I found lots of things, that I liked, but two specific items inspired me the most. The first was this color system of a dark gray wall with the white trims:
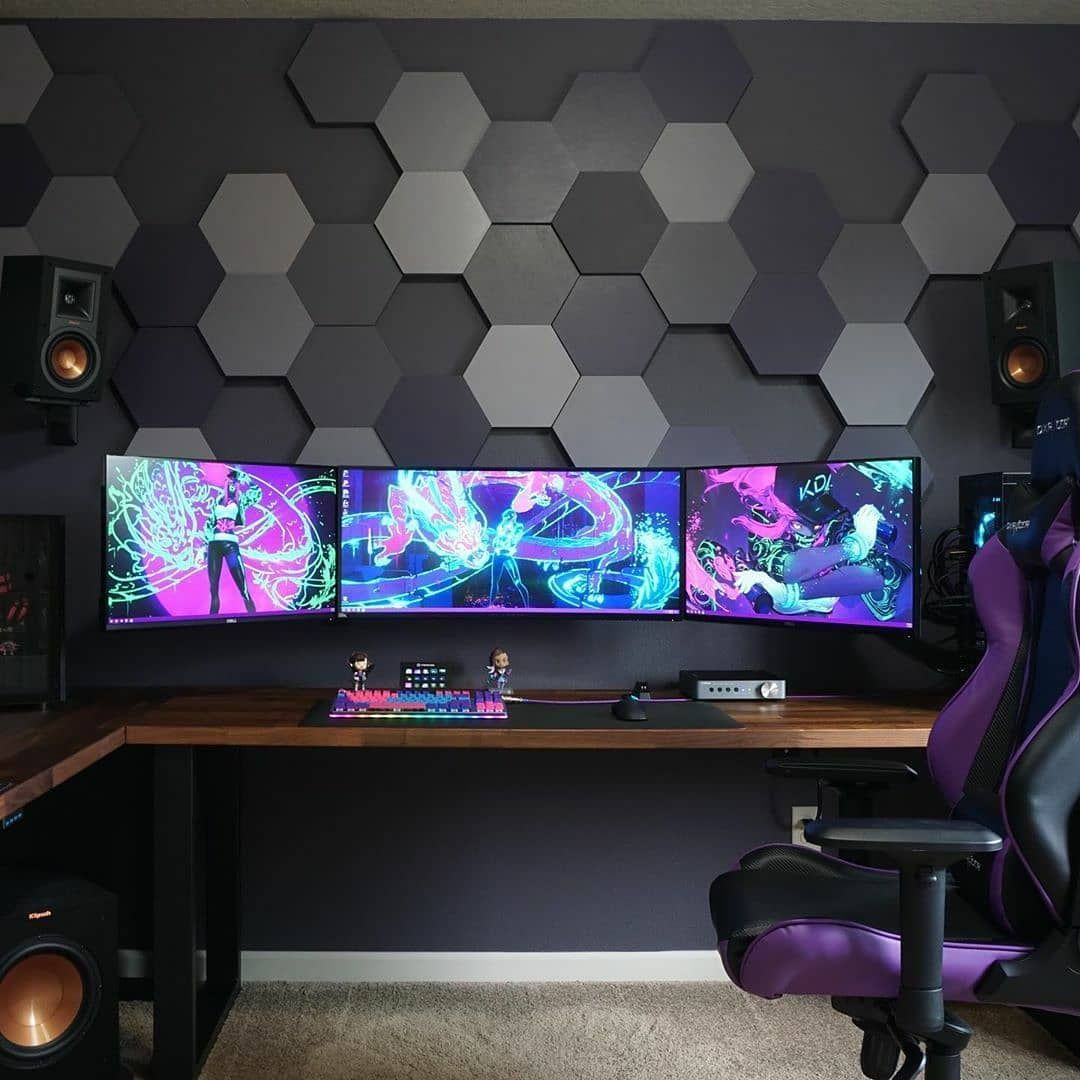
Whilst I didnt mind the hex patterns in the photo, I had a feeling it would not suit my office (totally not a games room) as much, but it shows me that I did not want a big "blank" wall. So I knew I needed something for that.
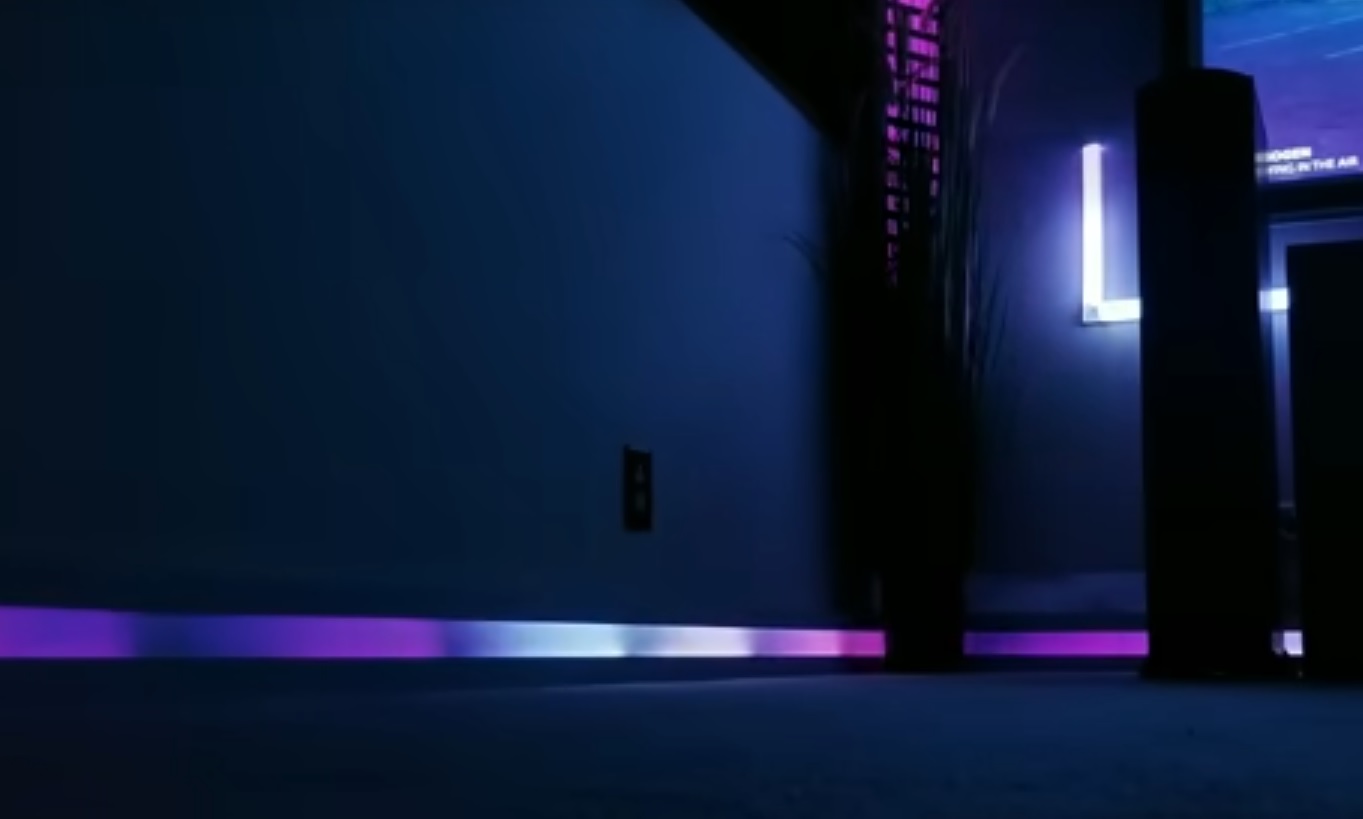
The second inspiration I found of a YouTube video by Chris Maher here, which was his version of a DIY RGB skirting board. I knew I wanted some RGB lighting in the room, and I thought the skirting board idea was cool, so I definitely drew inspiration there.
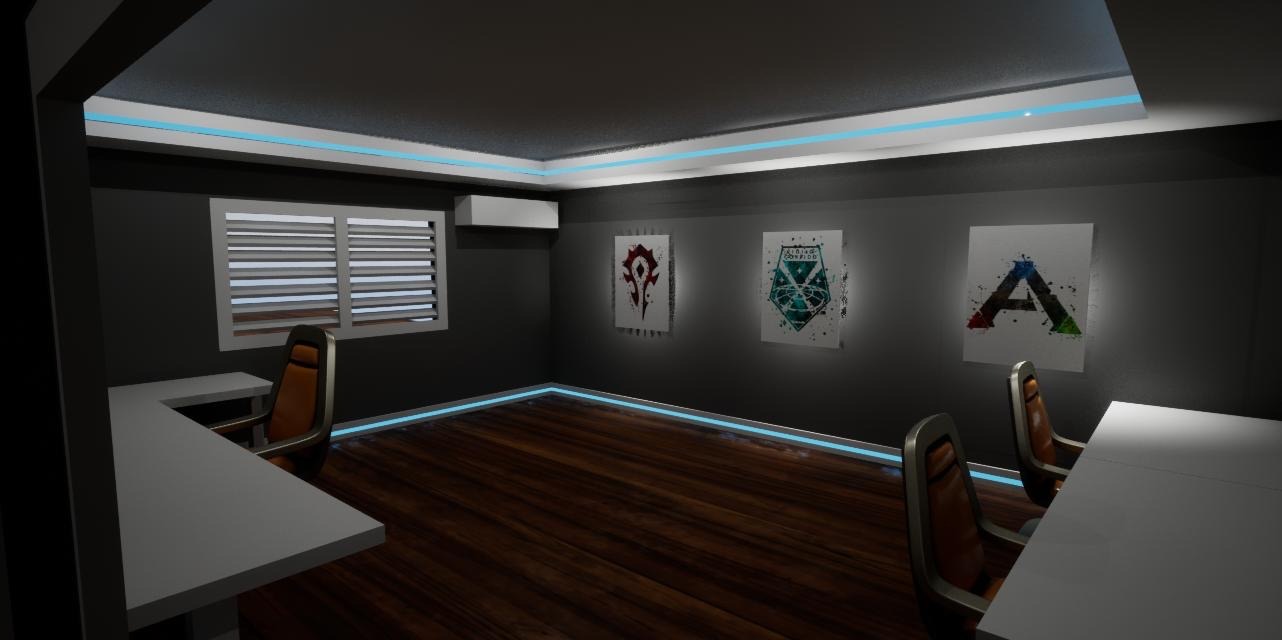
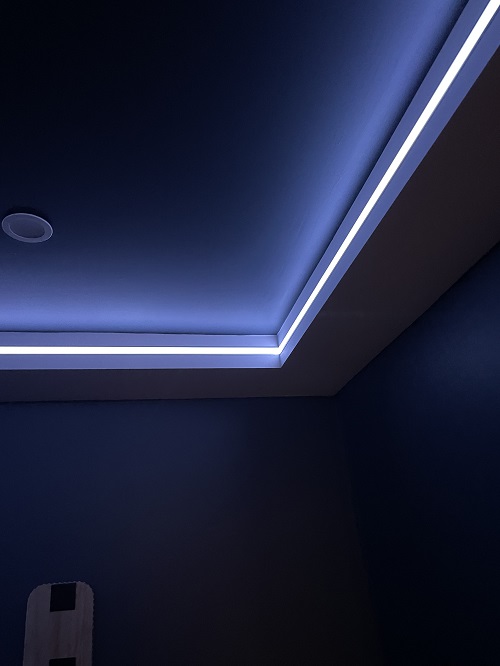
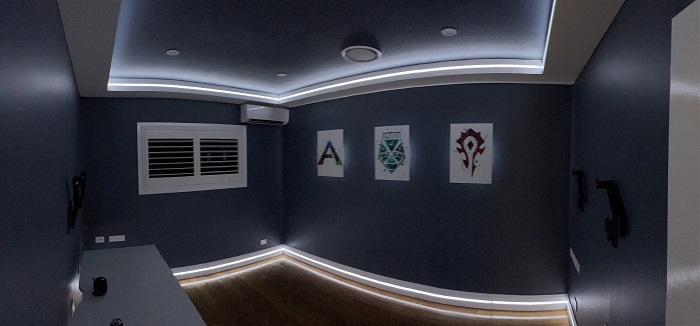
Lastly I had a feeling in my head I wanted some art on the wall, but I wanted it backlit. Suprisingly I could not find many good photos of this online, so I just went with my gut on what it would look like and locked it in. Using my Unreal Engine 3D skills, I put together my "concept" of what I wanted the room to look like (turned out pretty close I reckon?).

Demolition & construction time
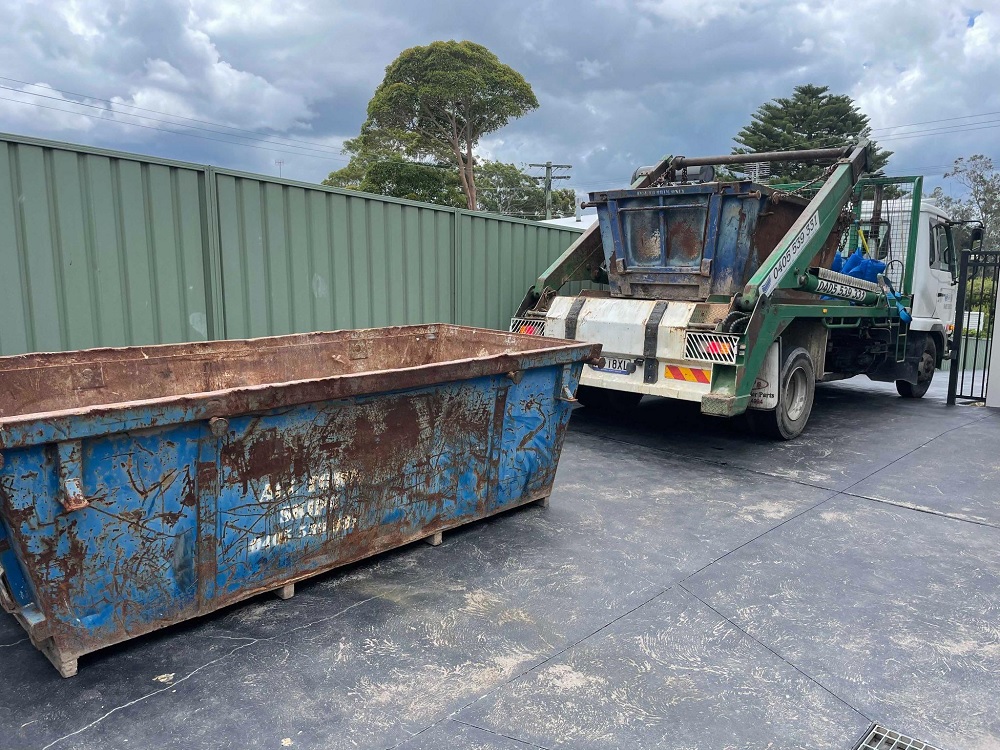
I'm not sure exactly at what point my lovely wife started to get nervous about the scale of what I wanted to do; but I suspect when the large trucks started arriving it was probably around then :)
I was fortunate enough to find a local professional carpenter and joiner, Paul from CKJM Projects. The first step was pulling down the original ceiling. Whilst the ceiling was down, I took the opportunity to run some low voltage cables to the other side of the room (for power injection of the RGB lights). Once the prep was complete, Paul packed in both special sound insulation battons and some normal ones into the ceiling cavities.
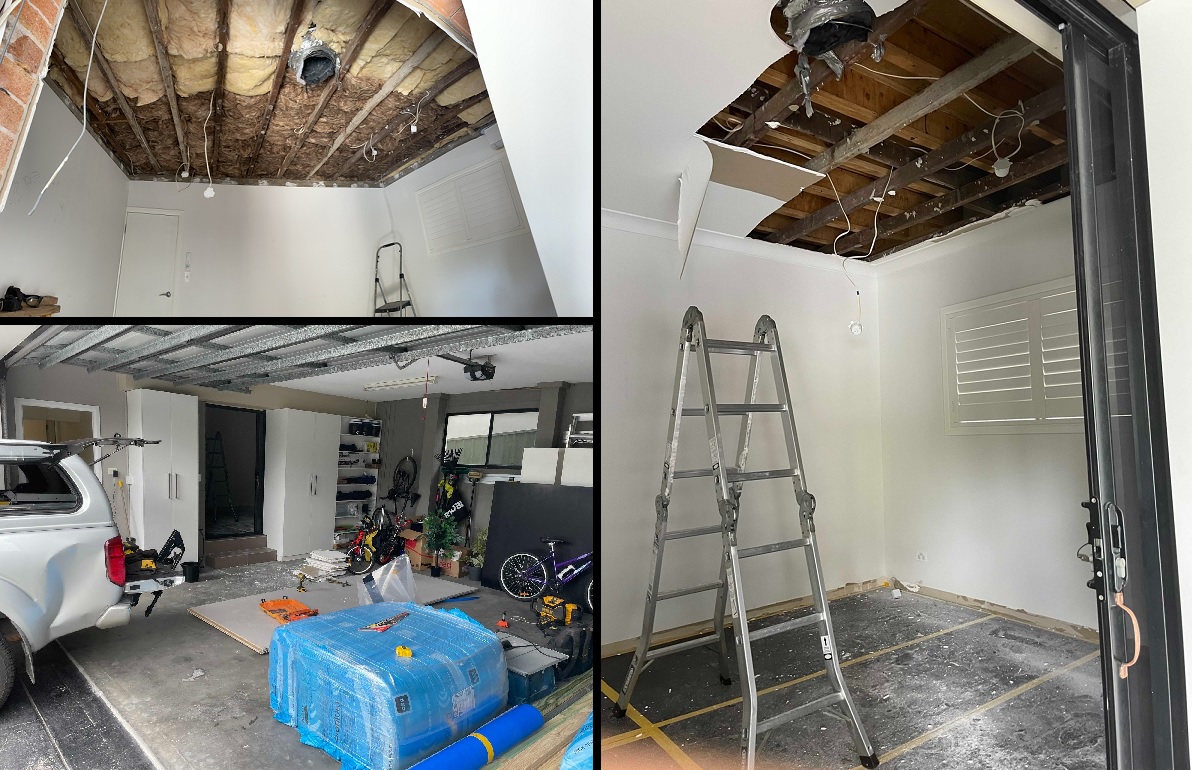
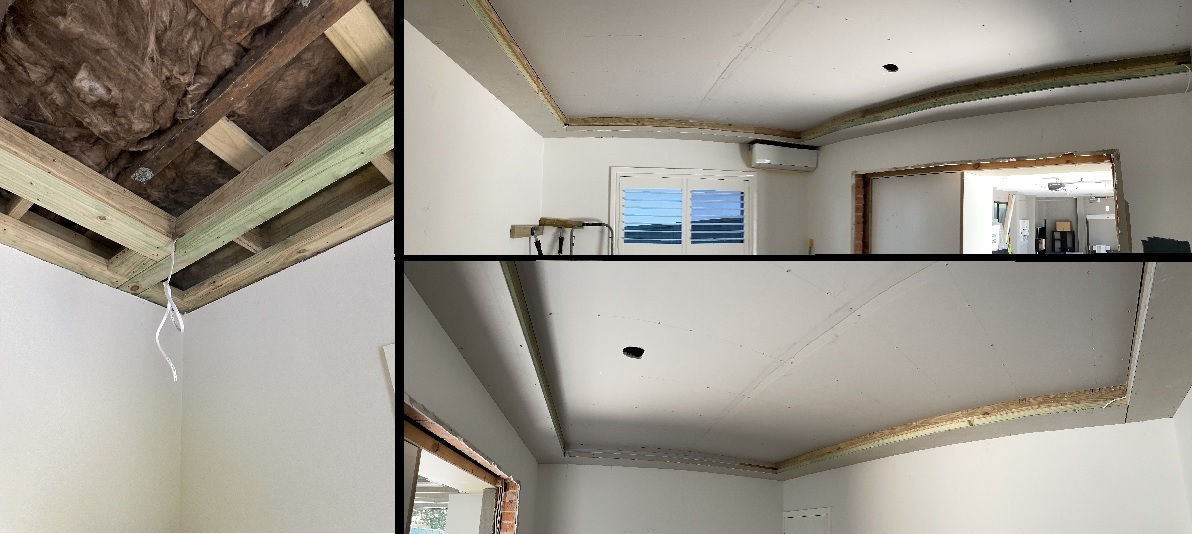
From there the building of new bulk heads started. The bulk heads needed a dedicated space left open for the RGB aluminum channels to eventually go in. In addition, Paul had to add a special cavity above the existing air conditioner unit to allow the air flow up top. Finally it was time to gyprock the ceiling and bulkheads.
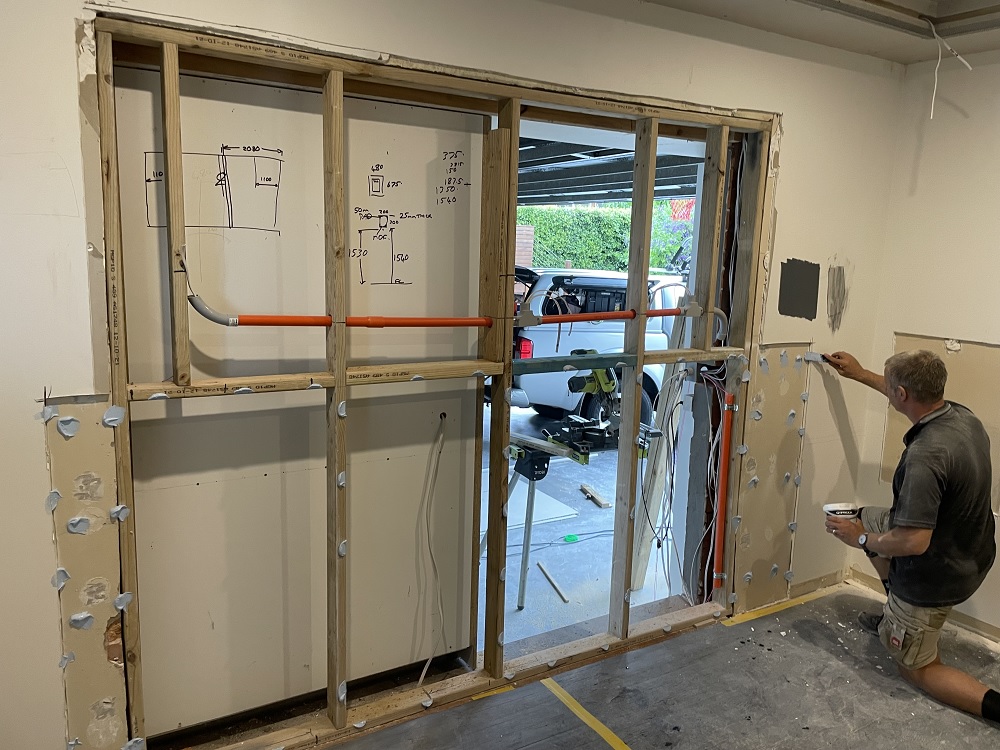
Then the garage door wall was done, closing that off permanently. This included the provisioning of low voltage cables for lighting for the three pictures going on the wall. I also took the opportunity to pre-drill all the monitor arm locations and create channels to hide the monitor cables (they are all brick walls, so was not like a simple gyprock hole unfortunately). I also got my local electrician (Luke from Wambral Electrical) to adjust the power points, and we added in multiple new dedicated network ports back to my local rack.
Painting
I did all the painting myself to save some cash (was burning through it at a high rate by this stage). Did a full undercoat on all ceilings, bulkheads and walls. Then did two full coats on the bulkhead and trims, followed by two full coats on the ceiling and walls.
I had Paul leave the skirting boards off the walls before the painting, so I was able to paint those separately and not have to worry about trying to cut in along those (the bulk heads took forever as it was). So we put those on separately after the painting was complete.
RGB all the things
I've never done LED strip work in the past. But I knew that LED strip lights was going to form a major part of my office (totally not a games room). Primarily the ability to code different and unique lighting modes is important. For example during the day while I'm working and on video meetings etc I'll need white cool lighting with a hint of color. Then at night I'll switch to a color pastel set.
Prior to construction starting I did a lot of research into RGB lights, the options, how to control them, how to wire etc. Special mention to The Hook Up channel who had a bunch of great videos on RGB lights and how to solder, what to watch out for etc.
But by far the single greatest resource is the QuinLED.info website. Primarily because Quindor himself is focused fully on RGB controllers, tech and in depth technical knowledge. From guides on what size AWG cabling to use, to power requirements, recommendations on tooling etc, it was simply invaluable to what I wanted to do.
Quin sells RGB controllers, so I grabbed a couple of those. Then spent a few weeks watching various videos and trying to understand the tech and optioins. Part of the issue is that I need to run nearly 30 meters of RGB addressable lights. That is a lot, and made the job more complex than just plugging lights in.
Eventually I settled on SK8612 12V lights. I picked the SK8612 because they are individually addressable lights, but include a 4th "white" channel. So rather than make white by combining red+green+blue as most lights do, they have a dedicated 4th LED that is actually "white". This makes the white significantly brighter, suiting my office (totally not a games room) during day time better.
The second reason is the 12V option rather than a normal 5V choice. The 12V meant I did not need to run as much "power injection" along the lights, simplifying the installation slightly. For those who dont know, power injection means adding additional power to the RGB strip about half-way along (i.e. on the other side of the room), because you cannot push enough power at the start.
For the power I calculated I would have 579 addressable light sections giving a total of 1,737 individual LEDs. Chatting to Quindor on Discord, and using the power charts on Quindor's website, I calculated the system would draw somewhere around maximum 250 watts of power. So I grabbed a single Mean Well 350W 30A power supply from Amazon.
I also did a lot of research into aluminum light tracks. I knew the effect I wanted was a "full color" with as least 'dot' effect as possible. So for that I needed deep tracks that would be suitable to be mounted sideway into the bulkhead and skirting boards. Supply was an issue, as many places did not have stock. Eventually I settled on 30 meters of Lucretia 105 Facade Extrusion Strip Profile, which I've been super happy with.
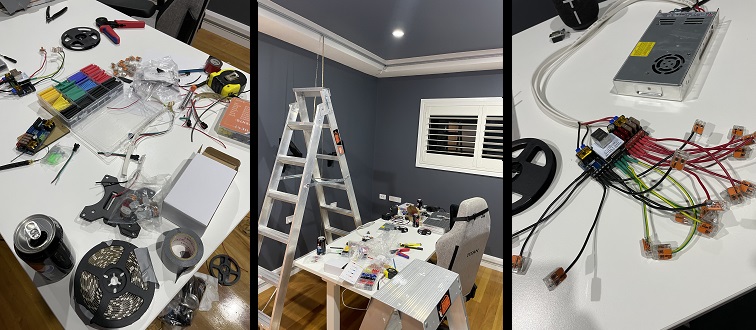
So the construction phase included lots of pre-wiring of low voltage cables, to help hide and keep the solution tidy. I ran all of these into the garage (where the old door was), and decided the unit would run in there, keeping my office space clean (it can be remote controlled via the network, so it doesnt need to be in the room with me).
From there I ordered about 15 items and tools from Amazon and AliExpress to complete the installation, based upon Quindor's tool page. (although if my wife is reading this, hey babe: that's a typo and I meant to say "3").
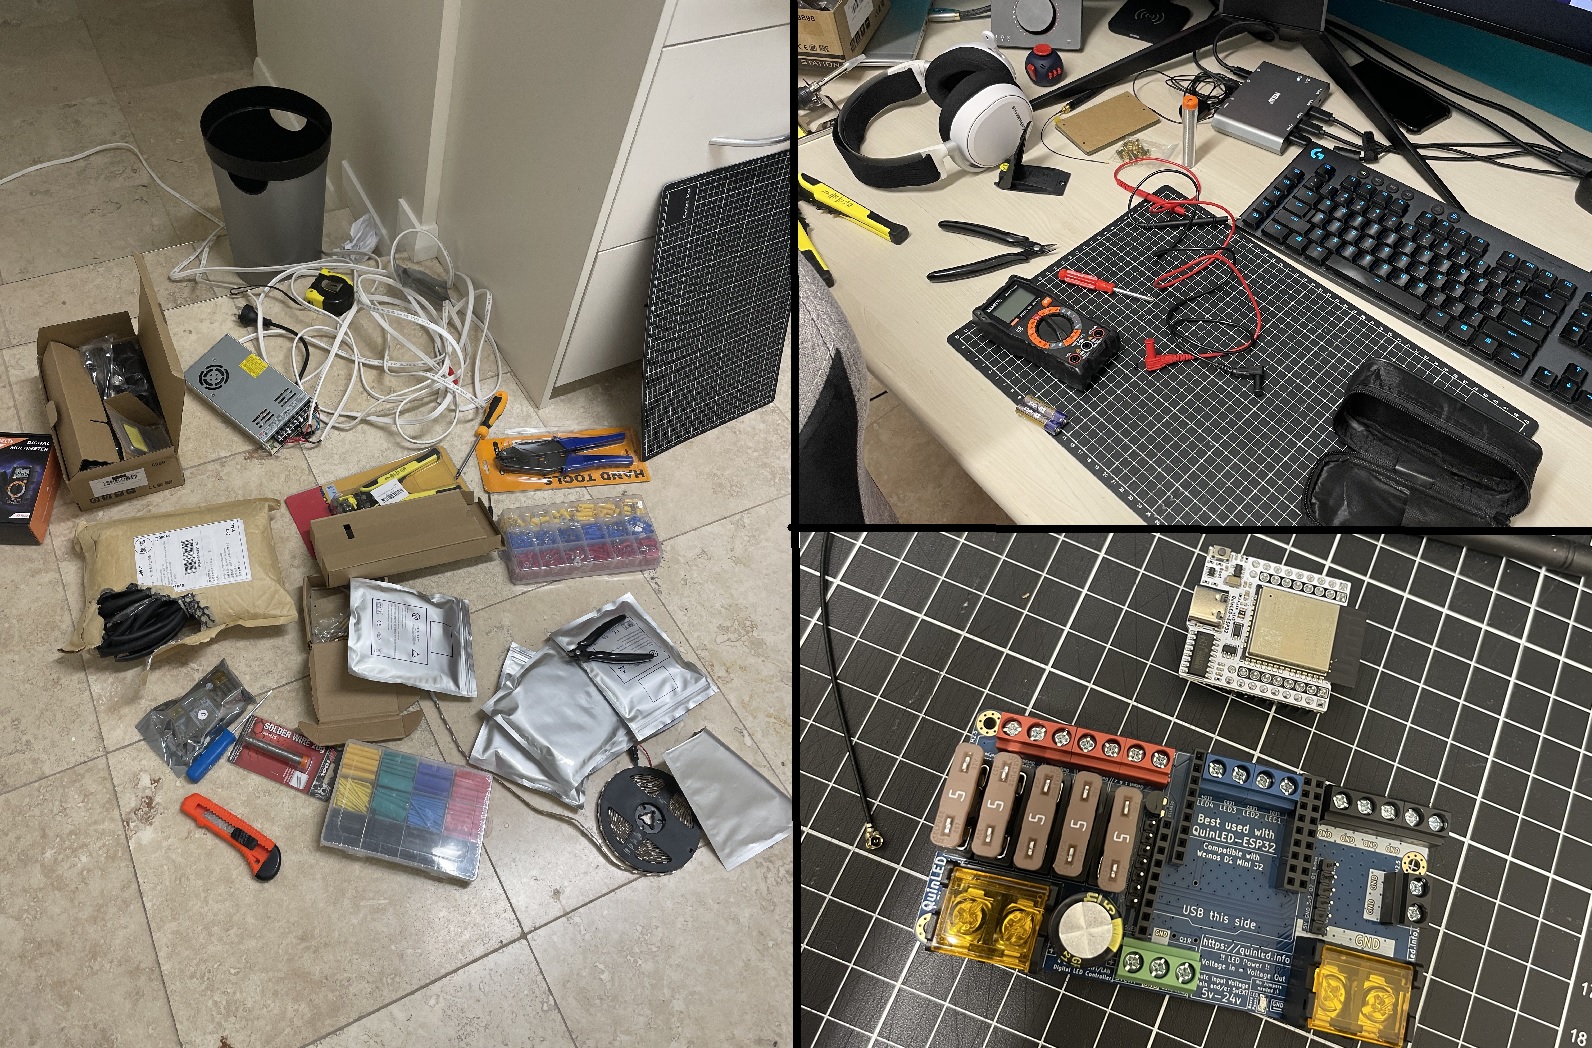
Some of the items had to come from China and took up to 5 weeks due to COVID etc. But eventually it all arrived and I got started. Using the QuinLED-Dig-Quad Pre-Assembled board, coupled with the WLED firmware here, it is a very powerful solution.
Then I spent a couple of evenings actually installing and setting up the lights. Firstly I had to install all the aluminum channels, but they just slotted straight into place thanks to Pauls awesome carpentry skills. Then I had to measure the amount of lighting strips needed for each run.
The strips come in 5 meter lengths, but my runs were up to 15 meters, so I had to solder multiple strips together to create one continuous run. Then physically attach those longs strips into the aluminum channels. Finally, using WAGO connectors (which are an amazingly simple yet powerful gadget), I was able to connect all the cables together without too much fuss.
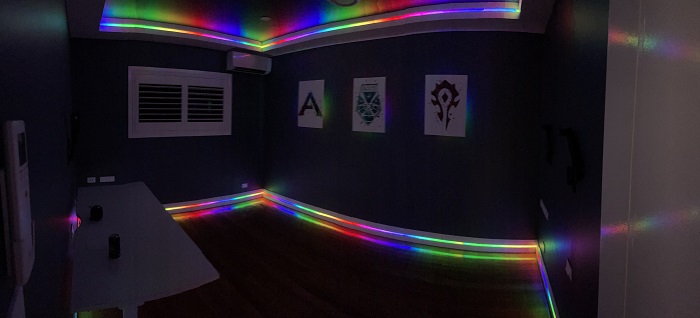
Done and done
So after 12 weeks (8 weeks of planning and 4 weeks of construction/setup) the room is finally done! It is just as I had pictured in my mind, and I'm super happy with the results.
And here is the final video again (best played with sound):
From here I need to play around with WLED a bit more - there are literally 100's of settings. I plan on combining the system into my Home Automation using an Elgato Stream deck. This will allow me to have preset modes (such as 'work' and 'play') and have the room switch modes at just the touch of a button.
Thanks for taking the time to read all of this. If you have any questions or want specific details on stuff I've done, feel free to reach out to me (email in footer below).